

ASP.NET Core 6 introduced a simplified hosting model that allows us to build lightweight APIs with minimal dependencies. These minimal API projects make it easy to get our application up and running fast, by writing less boilerplate code. ASP.NET Core 7 further improved minimal APIs by adding support for filters.
Whenever you work with APIs—including minimal APIs—you will often want to document your endpoints. Fortunately, ASP.NET Core provides built-in support for the OpenAPI specification, so you can take advantage of OpenAPI and the Swagger UI to generate nice documentation for all of your APIs.
The goal of this post is to give you a head start on doing so. To use the code examples provided in this article, you should have Visual Studio 2022 installed in your system. If you don’t already have a copy, you can download Visual Studio 2022 here.
Create a minimal Web API project in Visual Studio 2022
First off, let’s create an ASP.NET Core project in Visual Studio 2022. Follow these steps:
- Launch the Visual Studio 2022 IDE.
- Click on “Create new project.”
- In the “Create new project” window, select “ASP.NET Core Web API” from the list of templates displayed.
- Click Next.
- In the “Configure your new project” window, specify the name and location for the new project.
- Optionally check the “Place solution and project in the same directory” check box, depending on your preferences.
- Click Next.
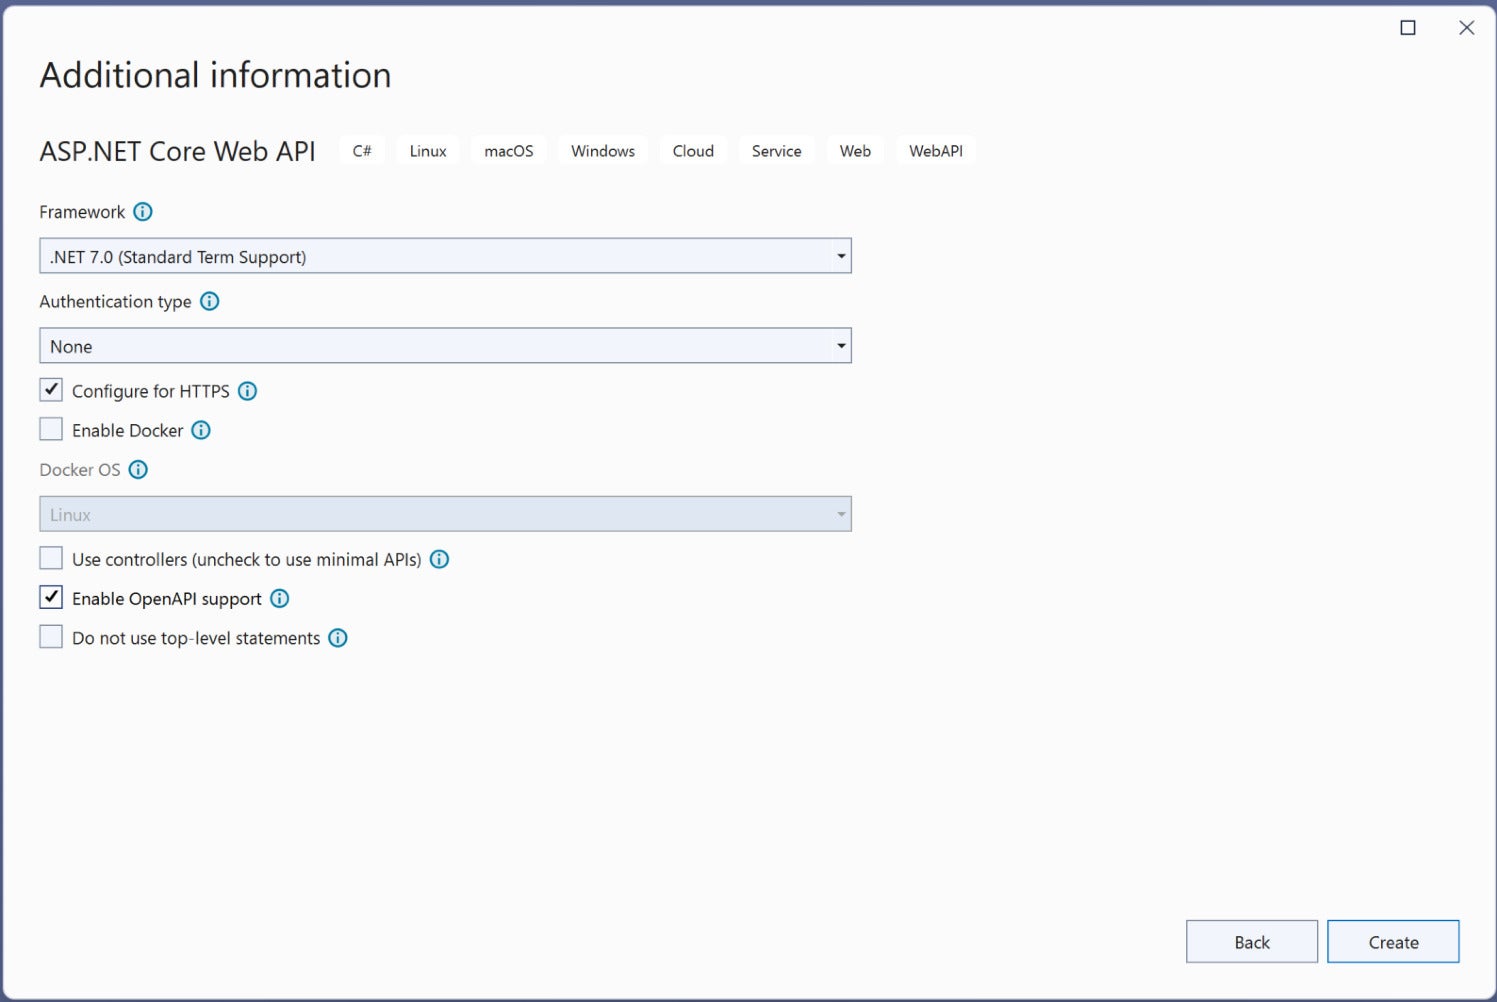
- In the “Additional Information” window shown next, uncheck the check box that says “Use controllers…” since we’ll be using minimal APIs in this example. Leave the “Authentication Type” set as “None” (default). Check the “Configure for HTTPS” and “Enable Open API Support” check boxes. Finally, ensure that the “Enable Docker” check box is unchecked as we won’t be using Docker here. (See Figure 1 below.)
- Click Create.
 IDG
IDGFigure 1. Check the Configure for HTTP and Enable OpenAPI Support check boxes. Leave Authentication set to None and the other check boxes unchecked.
We’ll use this ASP.NET Core 7 Web API project to use OpenAPI to document minimal API endpoints in the sections below.
What is the OpenAPI specification?
Previously known as the Swagger specification, the OpenAPI specification defines a standard, machine-readable, programming language-agnostic interface description language (IDL) for APIs. It is a language-independent standard for describing HTTP APIs. The standard is supported by a combination of built-in APIs and open-source libraries.
The three most significant aspects of OpenAPI integration in an application are:
- Creating information about the app’s endpoints.
- Putting the data together in a format compatible with the OpenAPI standard.
- Exposing the created OpenAPI schema through a graphical user interface or a serialized file.
Because we enabled OpenAPI support when we created our ASP.NET Core 7 Web API project, the Swashbuckle.AspNetCore package will be added to the project automatically. Swashbuckle is an open source project that enables the generation of Swagger documentation.
Note that you can always add the Swashbuckle.AspNetCore NuGet package to your other projects manually.
Create a simple minimal API endpoint in ASP.NET Core
When you create a new ASP.NET Core Web API project in Visual Studio, the default controller (named WeatherForecast) and model class will be created automatically. Because we’re using minimal APIs here, these files will not be created.
Instead, a default HTTP GET endpoint will be created in the Program.cs file. Now, replace the default generated code of the HTTP GET endpoint with the following code.
app.MapGet("https://www.infoworld.com/", () => "Hello World!")
.WithName("Welcome")
.WithOpenApi();
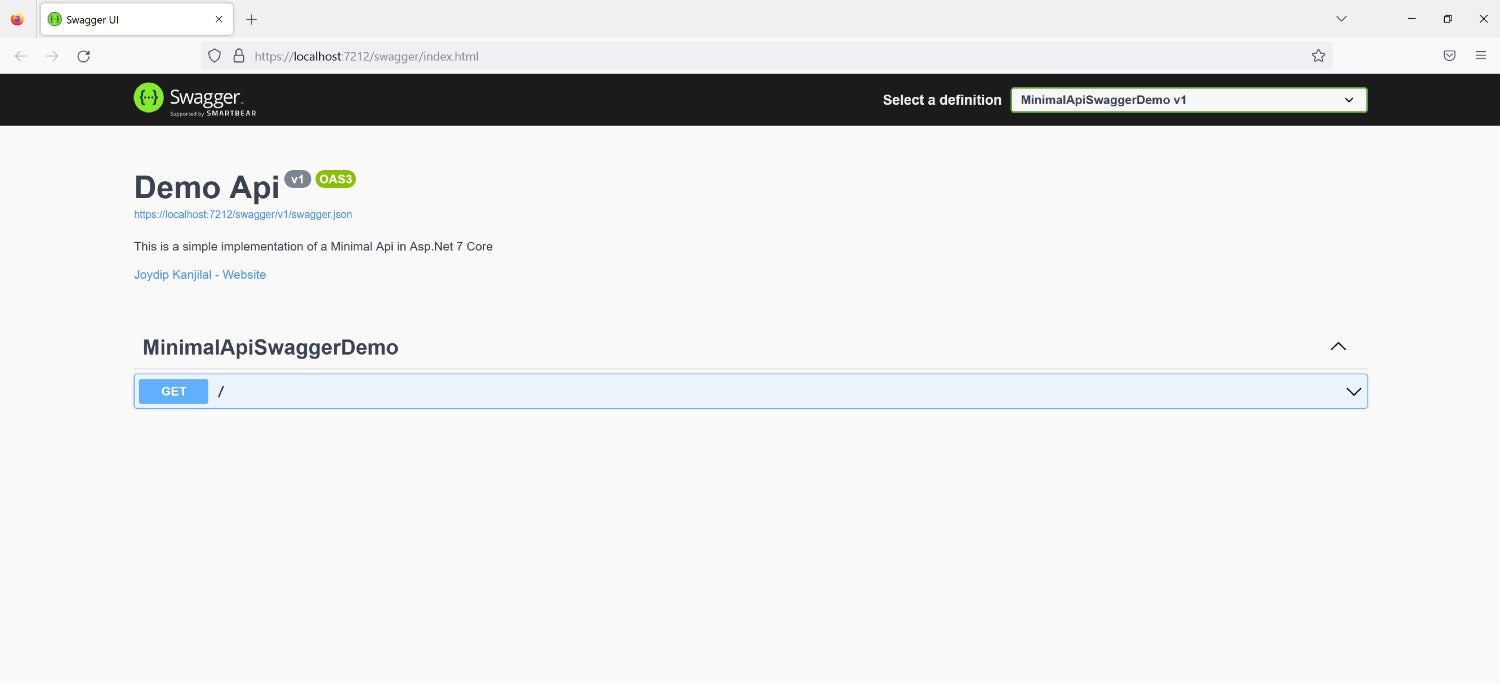
When you run the application, you’ll be able to see the Swagger UI in your web browser, as shown in Figure 2.
 IDG
IDGFigure 2. The Swagger UI.
Configure Swagger in a minimal API in ASP.NET Core
The code snippet below illustrates how you can configure the Swagger middleware to add metadata for the API document.
builder.Services.AddSwaggerGen(setup => setup.SwaggerDoc("v1", new OpenApiInfo()
{
    Description = "This is a simple implementation of a Minimal Api in Asp.Net 7 Core",
    Title = "Demo Api",
    Version = "v1",
    Contact = new OpenApiContact()
    {
        Name = "Joydip Kanjilal",
        Url = new Uri("https://joydipkanjilal.com")
    }
}));
When you execute the application now, the metadata you added will be displayed in the Swagger UI as shown in Figure 3.
 IDG
IDGFigure 3. Adding API metadata.
Create a model class
Now let’s flesh out our minimal API example application. First, create a model class using the following code.
public class Author
{
    public int Id { get; set; }
    public string FirstName { get; set; }
    public string LastName { get; set; }
    public string Address { get; set; }
    public string Email { get; set; }
    public string Phone { get; set; }
}
Create and implement an interface
Next, create an interface named IAuthorRepository and enter the following code.
public interface IAuthorRepository
{
    Author GetById(int id);
    void Create(Author entity);
    void Delete(Author entity);
    void Update(Author entity);
}
Now create another class named AuthorRepository and enter the following code.
public class AuthorRepository : IAuthorRepository
{
    void IAuthorRepository.Create(Author entity)
    {
        throw new NotImplementedException();
    }
    void IAuthorRepository.Delete(Author entity)
    {
        throw new NotImplementedException();
    }
    Author IAuthorRepository.GetById(int id)
    {
        throw new NotImplementedException();
    }
    void IAuthorRepository.Update(Author entity)
    {
        throw new NotImplementedException();
    }
}
Note that none of the methods of the AuthorRepository class have been implemented. We’ll use this skeleton implementation just for the purposes of seeing how we can work with OpenAPI in minimal API applications.
Create a minimal API endpoint
Lastly, delete the endpoint we created earlier since we won’t be needing it anymore. Instead, add the following piece of code to your Program.cs file to create four new endpoints.
app.MapGet("/authors/{id}", async ([FromServices] Author entity, int id) =>
{
    return Results.Ok();
});
app.MapPost("/authors", async ([FromServices] Author entity) =>
{
    return Results.Ok();
});
app.MapPut("/authors/{id}", async ([FromServices] int id, Author entityToUpdate) =>
{
    return Results.Ok();
});
app.MapDelete("/authors/{id}", async ([FromServices] int id) =>
{
    return Results.Ok();
});
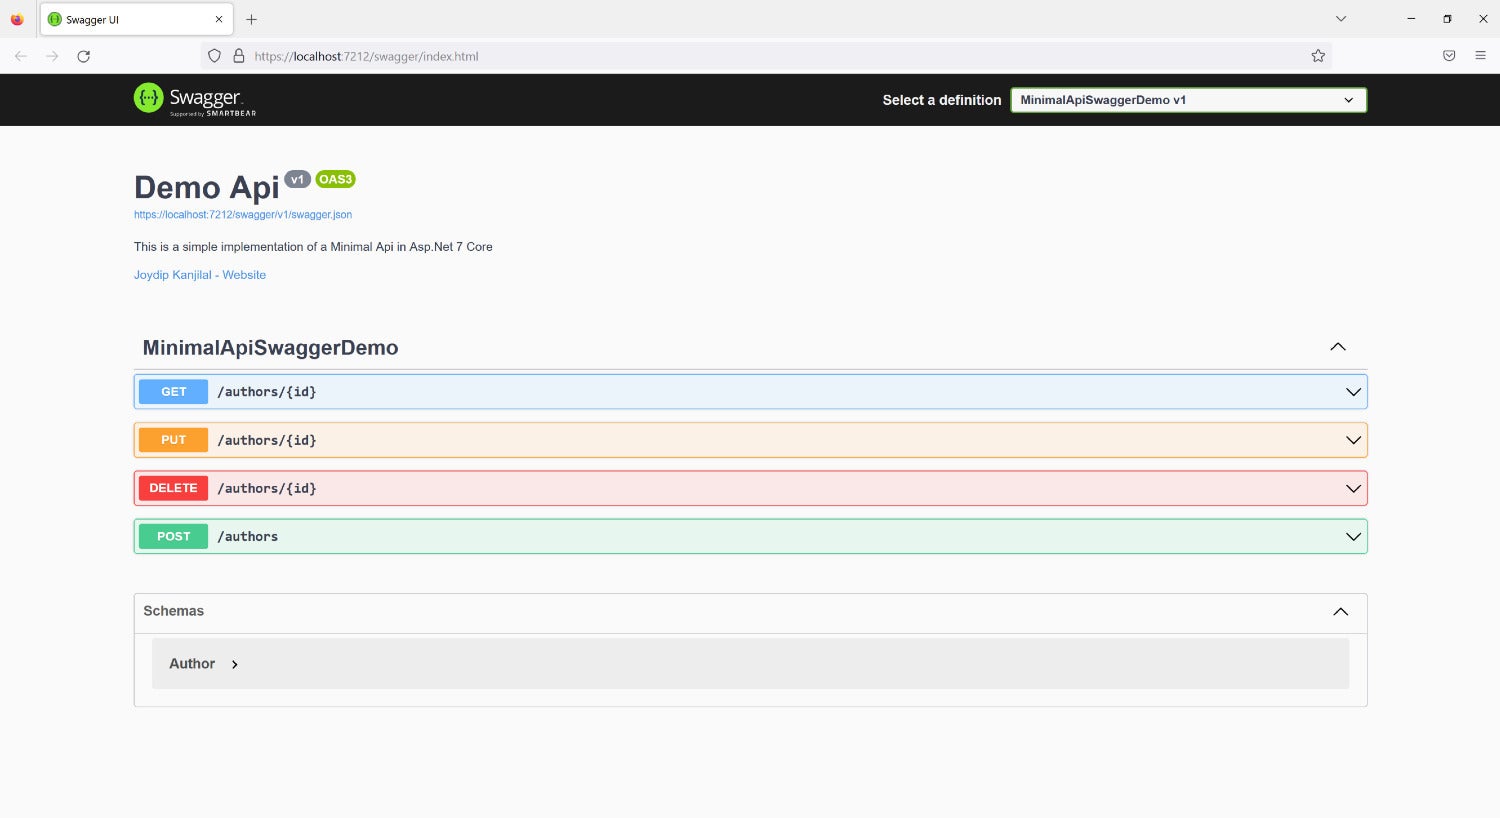
When you run the application, you should see these endpoints displayed in your Swagger UI as in Figure 4.
 IDG
IDGFigure 4. The four endpoints of our minimal API.
Complete minimal API example in ASP.NET Core
The complete code listing for our OpenAPI-documented minimal API is given below for your reference.
using Microsoft.AspNetCore.Mvc;
using Microsoft.OpenApi.Models;
var builder = WebApplication.CreateBuilder(args);
// Add services to the container.
builder.Services.AddEndpointsApiExplorer();
builder.Services.AddSwaggerGen();
builder.Services.AddSwaggerGen(setup => setup.SwaggerDoc("v1", new OpenApiInfo()
{
    Description = "This is a simple implementation of a Minimal Api in Asp.Net 7 Core",
    Title = "Demo Api",
    Version = "v1",
    Contact = new OpenApiContact()
    {
        Name = "Joydip Kanjilal",
        Url = new Uri("https://joydipkanjilal.com")
    }
}));
var app = builder.Build();
// Configure the HTTP request pipeline.
if (app.Environment.IsDevelopment())
{
    app.UseSwagger();
    app.UseSwaggerUI();
}
app.UseHttpsRedirection();
app.MapGet("/authors/{id}", async ([FromServices] Author entity, int id) =>
{
    return Results.Ok();
});
app.MapPost("/authors", async ([FromServices] Author entity) =>
{
    return Results.Ok();
});
app.MapPut("/authors/{id}", async ([FromServices] int id, Author entityToUpdate) =>
{
    return Results.Ok();
});
app.MapDelete("/authors/{id}", async ([FromServices] int id) =>
{
    return Results.Ok();
});
app.Run();
public class Author
{
    public int Id { get; set; }
    public string FirstName { get; set; }
    public string LastName { get; set; }
    public string Address { get; set; }
    public string Email { get; set; }
    public string Phone { get; set; }
}
public interface IAuthorRepository
{
    Author GetById(int id);
    void Create(Author entity);
    void Delete(Author entity);
    void Update(Author entity);
}
public class AuthorRepository : IAuthorRepository
{
    void IAuthorRepository.Create(Author entity)
    {
        throw new NotImplementedException();
    }
    void IAuthorRepository.Delete(Author entity)
    {
        throw new NotImplementedException();
    }
    Author IAuthorRepository.GetById(int id)
    {
        throw new NotImplementedException();
    }
    void IAuthorRepository.Update(Author entity)
    {
        throw new NotImplementedException();
    }
}
By enabling OpenAPI support in your Web API projects when you create them, you can have ASP.NET Core automatically document your HTTP endpoints, and you can view that information through the Swagger UI. Note you can customize the Swagger UI using Cascading Style Sheets, show enum values as string values, and create different Swagger documents for different versions of your API.
Copyright © 2023 IDG Communications, Inc.


