

It’s estimated that over the past decade, I’ve taken thousands of product photos.
Whether shooting in a studio or on location, I’ve found ways to ensure the products look their best. But times have changed, and now it’s time to discuss how to take product photos in 2023!
What Makes a Good Product Photo?
Good product photos are essential to any good product page and marketing strategy. After all, it’s the first thing customers see when browsing for a new product.
A great photo should capture the essence of your product and make it stand out from the competition.
The following factors can also help you take a great product photo:
- Lighting
- Camera in use
- Tripod
- Backdrops
- Props
- Styling
- Editing software
Lighting
Lighting is an essential factor when it comes to creating compelling product photography. Good lighting allows colors to be more accurate and vibrant, allowing the products to look their best.
It also adds depth and texture to the shots, making them appear more realistic and detailed. Proper lighting can help create a comfortable atmosphere to which customers may respond better and make them more inclined to buy the product.
Professional photographers typically use multiple light sources at varying angles to achieve the desired outcome when setting up product photography.
Having too little or too much of either may result in washed-out colors or harsh shadows that could ruin the aesthetics of a photo.
A good balance between ambient and artificial light should be used to create a natural-looking shot with the following:
- Contrast
- Saturation
- Color temperature
- Correct exposure levels
It’s important not to forget about adding reflections through reflectors or diffusers, as they will help add extra dimension and make photos come alive even more so than without them.
Photographers also need to consider that different types of light affect photographs; tungsten lighting creates warmer tones, whereas fluorescent lighting emits cooler tones.
Natural daylight can also be used as it gives off a softer light which is excellent for shooting subtle details like skin tones or fabrics while still providing good color accuracy overall.
When dealing with particular objects, such as jewelry with many reflective surfaces, there may be a cause for adding additional lights to reduce any unwanted glare or hotspots caused by bright areas on the object itself.
Knowing how different types of lighting affect product photography will ensure that your images are as accurate as possible and stand out from the competition in terms of quality and creativity!
Camera in Use
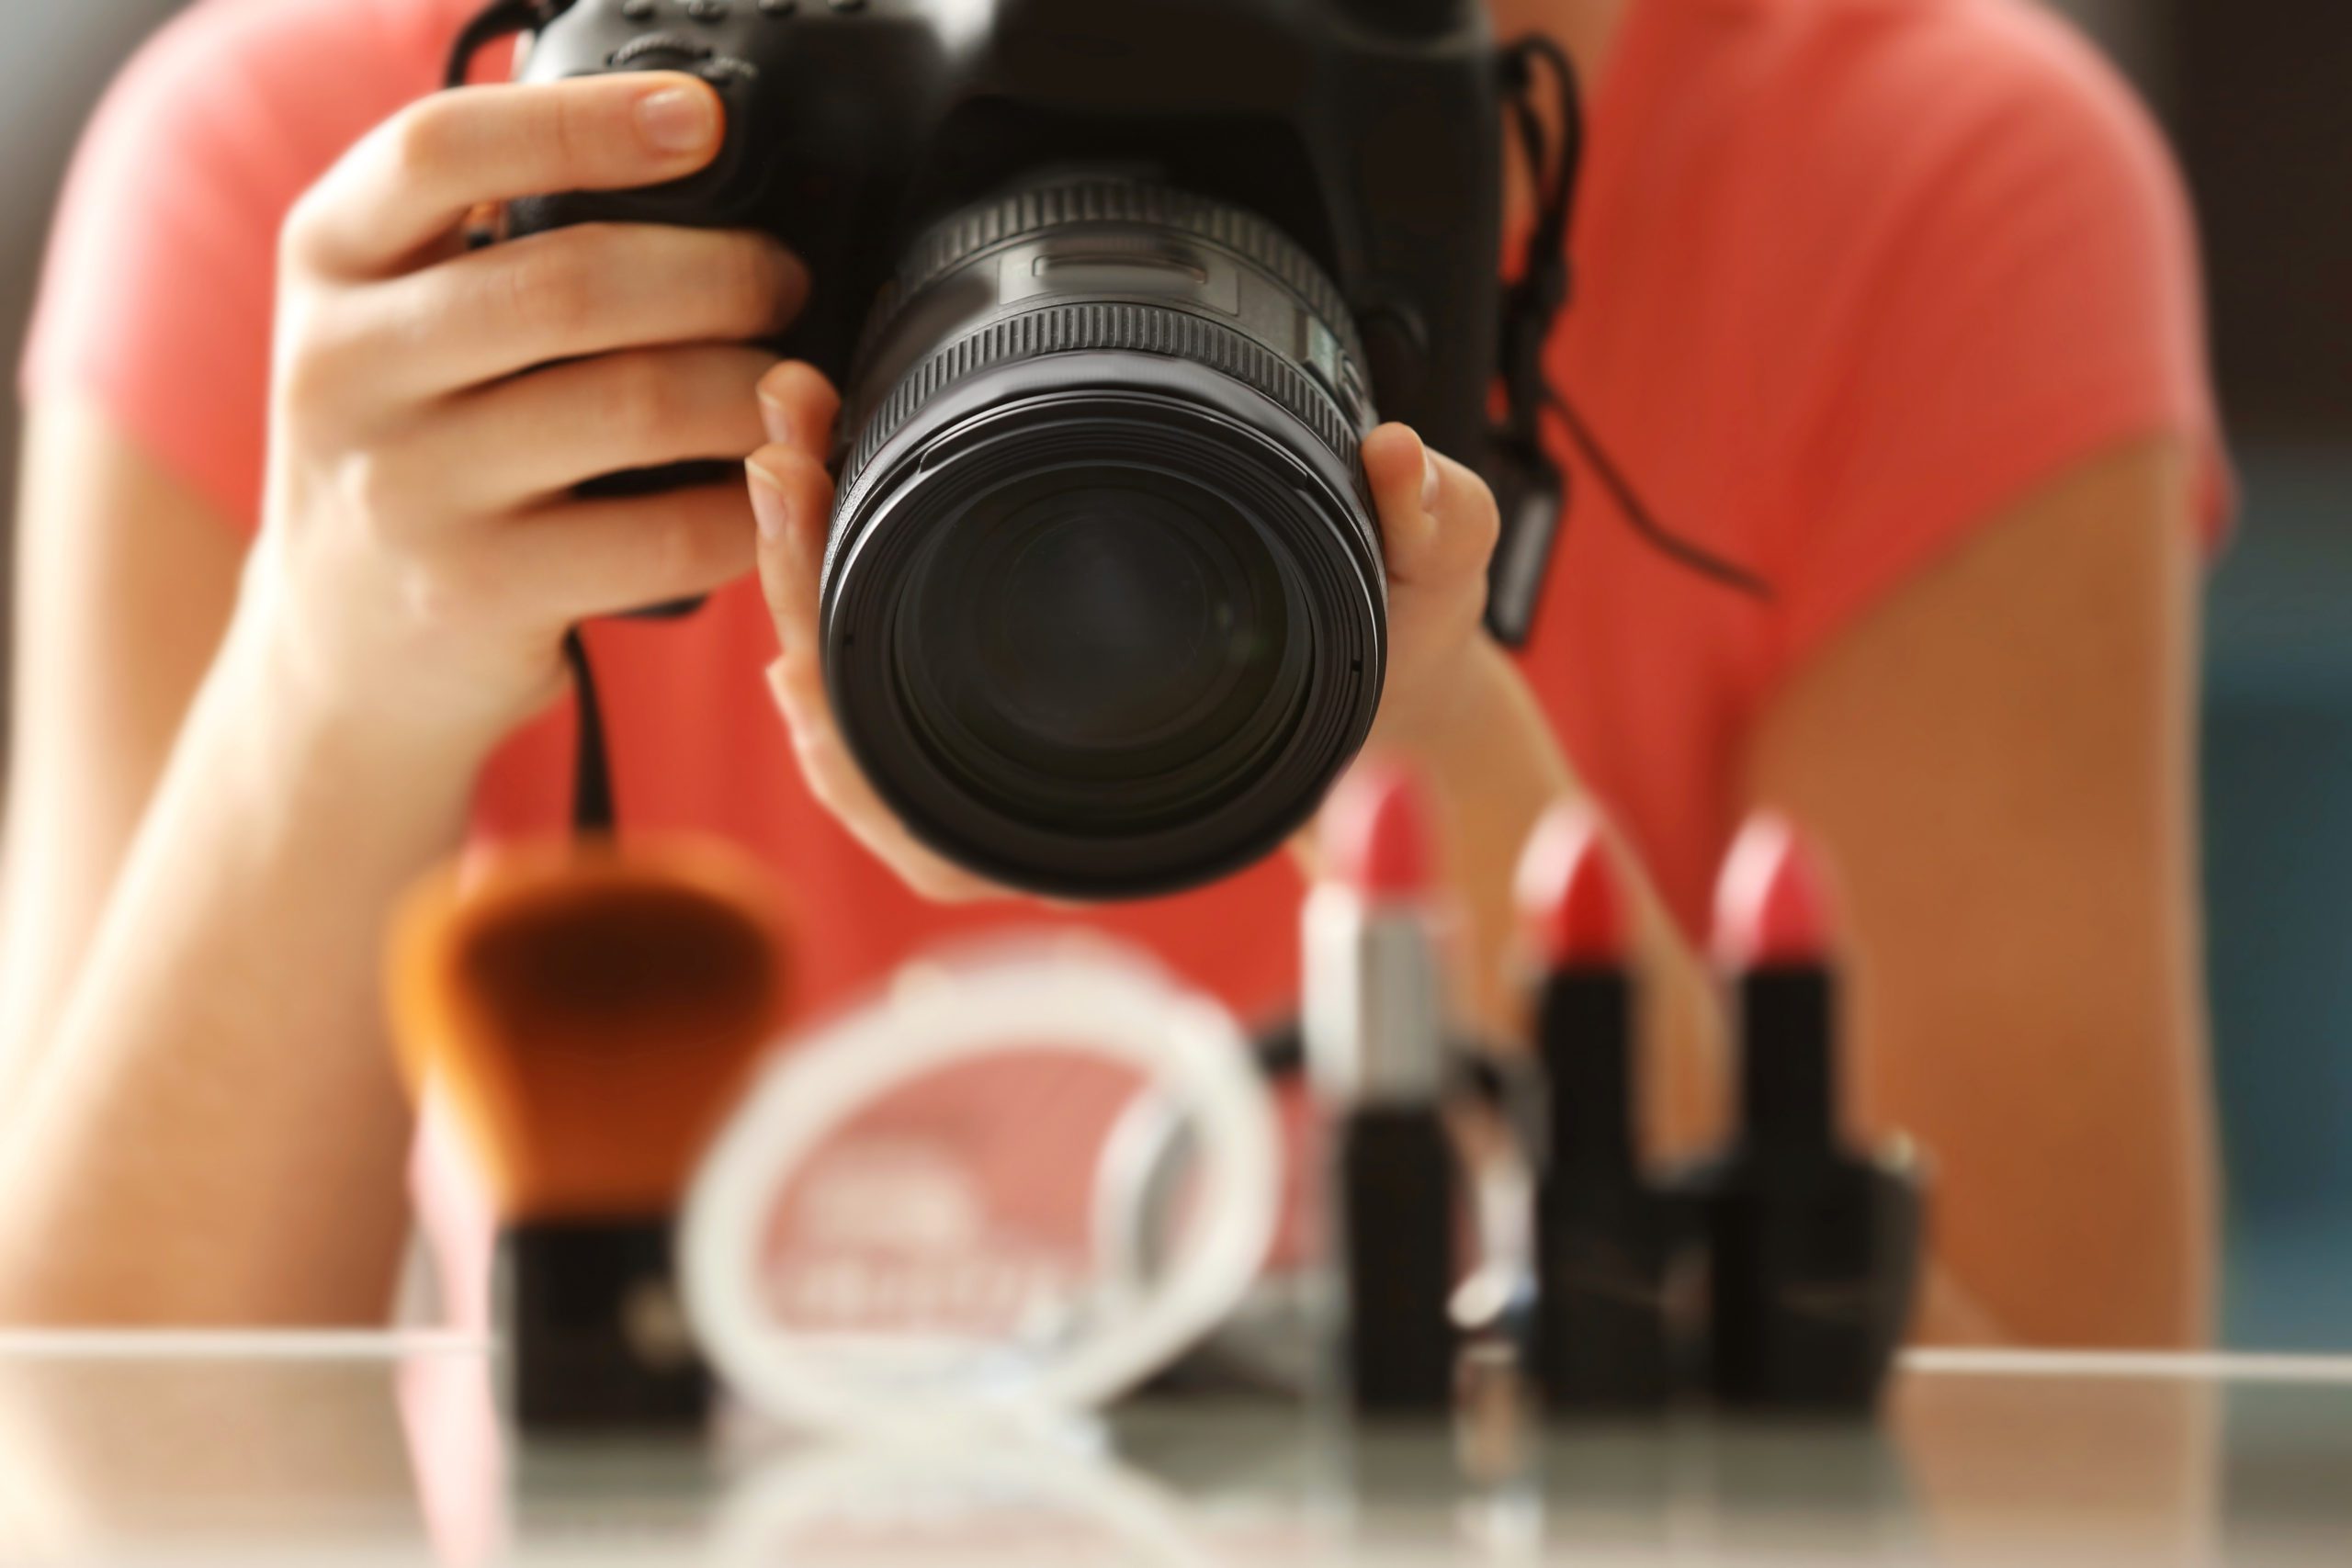
A great product photo starts with an excellent camera. Selecting the right tool for the job is paramount to creating a visually stunning photograph that can bring out the beauty and detail of a product.
While any digital camera today can take decent photos, choosing one with advanced features like:
- Autofocus
- Image stabilization
- Manual controls
These features give you much more flexibility and control over the quality of your photos.
The resolution should be adequate, too – although it doesn’t have to be top of the range if you are photographing something small – but try to go for at least 9 megapixels so that your images can be printed in large sizes without losing too much detail or sharpness.
It might be worth investing in a full-frame camera with higher resolution capabilities if you want to capture fine details such as textures.
When taking product photography, many photographers use prime lenses or zooms with wide apertures for maximum depth of field.
This will allow them to blur out distracting elements from their backgrounds, giving them more control over their composition.
For example, using an 85mm f/1.8 lens gives you greater control over the blur in your background, emphasizing your subject matter while keeping all other elements out of focus.
Additionally, faster shutter speeds will help freeze action while allowing enough light into the scene, so details don’t get lost.
Tripod
Tripods are essential for creating outstanding product photos.
A tripod is a three-legged stand that provides stability and precision in shooting, allowing you to use the following:
- Settings
- Various angles
- Lighting for the perfect shot
Tripods come in many different shapes and sizes, from small and lightweight to large, heavy-duty tripods with adjustable legs; each has its advantages depending on the type of product photography.
For example, a compact tripod is ideal for capturing close-up shots, while a tall tripod works great for taking images from further away.
Additionally, some tripods feature adjustable heads that allow you to adjust the angle of your camera lens or mount other lighting equipment. With a tripod’s increased stability, you can ensure that your product images remain sharp and not blurred due to camera shake.
Furthermore, having a steady platform is essential when shooting with a slow shutter speed (to capture motion blur), as even the slightest movement could ruin your photo results.
While it may take time to get used to setting up and working with a tripod correctly, using one will undoubtedly produce better-quality photos than handheld shots.
Additionally, tripods can save you time by reducing the number of shots required for each setup due to their precise accuracy when positioning and adjusting your camera or lighting.
Backdrops
Using a backdrop to create a great product photo is essential. A suitable backdrop can add depth and context to the picture, making it more attractive and memorable. It can also help showcase the product by providing contrast and highlighting its features.
When choosing a backdrop, consider the following:
- Colors
- Texture
- Pattern
- Size of the image
Particular attention should be given to color, as this will play an important role in setting the mood for your product shot. A bright or bold color can be used for energy or excitement, while softer colors provide a calmer look.
The texture is another important factor when selecting backdrops as it can help bring out details in the product being photographed.
Patterns are another way of creating interest in your photos and are often used to illustrate themes such as seasonality or trendiness.
Finally, size is key when selecting backdrops for product photos, as it must be proportional to the size of your product and not overpower it.
Choosing the right backdrop can significantly enhance a product photo by focusing on the item being photographed, adding depth, setting the atmosphere, and drawing attention to details that may otherwise have gone unnoticed.
Props
Props are a great way to add extra interest to product photos. They help give the picture a unique look and can be used to tell stories or create themes that relate to the product being photographed.
Props can range from small objects like flowers, books, toys, or jewelry, to larger items such as furniture, plants, or artwork.
When selecting props for your product photos, consider how they interact with the product and ensure they don’t overpower it. Make sure to choose props relevant to the product being photographed, as this will help draw attention to it and add a layer of context that can be useful in setting the mood.
Additionally, remember to choose props with colors that compliment those of the product, and if necessary, adjust light levels to make sure nothing is too bright or dull.
Using props in product photography is a great way to add interest and context to your images and can help communicate stories or themes that relate to the product itself. With careful consideration, props can be a powerful tool to help bring out the best features of any product photo.
Styling
Styling is an essential part of product photography as it helps draw attention to details that might otherwise go unnoticed. It involves arranging the item to showcase its features and draw viewers into the photo.
When styling your product photos, consider how you can make the item more presentable and memorable by adding elements such as texture or color.
Additionally, think about arranging the product in an exciting way that highlights its features and draws attention to any details you want to emphasize.
Finally, ensure your styling is consistent with the theme or message of the photo and that everything looks intentional and aesthetically pleasing.
Editing Software

Editing software such as background remover apps, Adobe Photoshop, and Lightroom are great tools for editing product photos.
These programs allow you to tweak your images by adjusting exposure levels or removing unwanted objects from the background.
Additionally, they can help bring out details in your product photos by enhancing color levels or sharpening lines and edges.
Remember that less is more when using these programs to edit product photos. Subtle adjustments are often the most effective and will help bring out details in the photo without overdoing it.
Overall, having a good understanding of how to use editing software can go a long way in helping you create professional-looking product photos. Technology has changed the game regarding product photography, and having the right tools can make all the difference.
Product Photography Shooting Angles
When shooting product photos, it’s important to have a variety of angles to create interest and highlight different features.
Angles such as a close-up shot, overhead shot, or side view can emphasize details that the viewer might otherwise miss. Additionally, try experimenting with different perspectives and think about how the product would look from a different point of view.
The following angles are essential to consider when shooting product photos:
- Eye level
- Birds eye
- High angle
- Slanted angle
- Low angle
Eye-Level
When shooting product photography from an eye-level angle, the photographer is trying to capture images from a perspective that mimics how the human eye sees an object.
This technique is fundamental in creating compelling and realistic product photographs, allowing viewers to better understand and connect with what they see.
The goal of such images is to invoke the feeling that someone could pick up the photographed object and use it just as they would if they saw it in real life.
Photographers need to be aware of their environment when taking photos at eye level and ensure no visual obstructions or objects are blocking their view. It’s important to ensure that all edges of the object are visible so the viewer can get a better idea of its form and shape.
A tripod may also be needed for stability so that any slight movement does not affect the image quality or blur out details.
Additionally, since eye-level shots attempt to mirror how we naturally look at something, photographers should pay attention to light sources when composing their images – natural or artificial – as this will help create shadows and highlights on the product surface, which will add texture and texture contrast between different parts of the product.
Keeping these elements at similar heights for still-life compositions featuring multiple items in one frame can create a powerful impact with strong visual appeal.
Bird’s Eye
Bird’s eye shots are great for capturing an overview of a product, such as a gadget or piece of furniture. This angle is directly above the object and shows its entire surface area.
The goal of this shot is to capture all details in one image and create a sense of scale for viewers.
When using this technique, photographers must ensure the object is surrounded by an interesting background that captures the eye. This can be anything from a textured surface or a vibrant color palette.
It’s also important to note that shadows play an essential role in making the product stand out and capture details when shooting from this angle. It’s crucial to ensure that shadows are not too dark, as this can make the image appear dull and flat.
High-Angle
The high-angle photography angle is an essential and often overlooked aspect of product photography. From a practical standpoint, this shooting angle allows the photographer to capture images from a perspective that provides an elevated vantage point of the subject matter.
This can be especially effective when photographing small products or items with intricate details, as it enables the image to show more depth and texture than can be achieved from a lower-angle shot.

Aside from its practical benefits, the high angle adds visual appeal to the final composition by creating a dynamic feel to the photograph. By taking advantage of gravity, shadows are cast onto the product and can add an extra layer of dimension and contrast – especially when paired with adequate lighting for dramatic effect.
Furthermore, graphical elements such as lines and curves will be accentuated when shooting at this angle, making it a great choice for showcasing a product’s form and design elements.
In summary, high-angle photography is an important tool in any photographer’s arsenal that can yield stunning results with smaller products while also providing creativity that isn’t always achievable with lower angles.
Slanted Angle
A diagonal angle shot is an interesting way to show off the form and shape of a product, as it creates a sense of depth and perspective.
This type of photography can emphasize certain details or features on a product, such as its curves or textures, that may not have been seen from other angles. It’s also great for creating a sense of movement or action.
When shooting with a diagonal angle, it’s important to keep the product in focus and make sure that all the details remain sharp and clear.
Additionally, shadows can play an important role in emphasizing certain elements of the product – be sure to experiment with different light sources and intensities to see what works best.
Slanted angle photography can be a great addition to your product portfolio as it provides an interesting take on the same subject matter from different angles.
Low Angle
A low-angle product photography shoot is essential for highlighting detail and emphasizing the object’s size.
It gives viewers a sense of greater depth and the impression that the photograph’s subject is larger than it is. The perspective creates a more interesting shot than an eye-level view.
Low-angle shots can be used to create an intimidating or authoritative atmosphere and convey a sense of power or superiority.
When shooting from a low angle, it’s important to make sure all elements in the frame are completely visible and to use plenty of negative space around your subject, so it stands out prominently against its surroundings.
This will help direct focus toward your subject and keep distractions at bay.
Wrap Up
Product photography can be a great way to showcase your products in their best light and attract potential customers. By experimenting with different angles, lighting techniques, and settings, you can create stunning visuals that will draw the eye and help you stand out from the competition.
Whether you’re shooting from a high or low angle or using shadows to emphasize curves and textures, there are many ways to make your product photos stand out from the rest. So get creative, have fun, and take your photography skills to the next level!
Do you have any questions about taking product photos? Let us know in the comments below!
Product Photography FAQ
A: It’s important to make sure that your camera settings are correctly configured for the type of image you want to capture. For example, choose a higher aperture setting to ensure all details remain focused if you’re shooting a smaller item.
A: Experimentation is key! Play around with different angles and lighting techniques to see what looks best. In post-production, you could also add graphical elements such as lines or curves to make your images more visually appealing.
A: Shadows can be used to add depth and dimension to your product photos and emphasize certain features or details of the object. Play around with different light sources and angles to see what works best for your product.

